Supported Data Models
-
Vulnerability Findings
- type:
code - type:
dependency - type:
container - type:
infrastructure
- type:
-
Resources
- type:
branch
- type:
Onboarding Checkmarx
Follow the steps below to onboard your environment to our Checkmarx integration.1
Access Identity and Access Management for your Checkmarx One Environment
Once logged in to your Checkmarx One environment, navigate to Identity and Access Management unde the Settings menu.
2
Create an OAuth Client
-
Navigate to OAuth Clients and click Create OAuth Client.
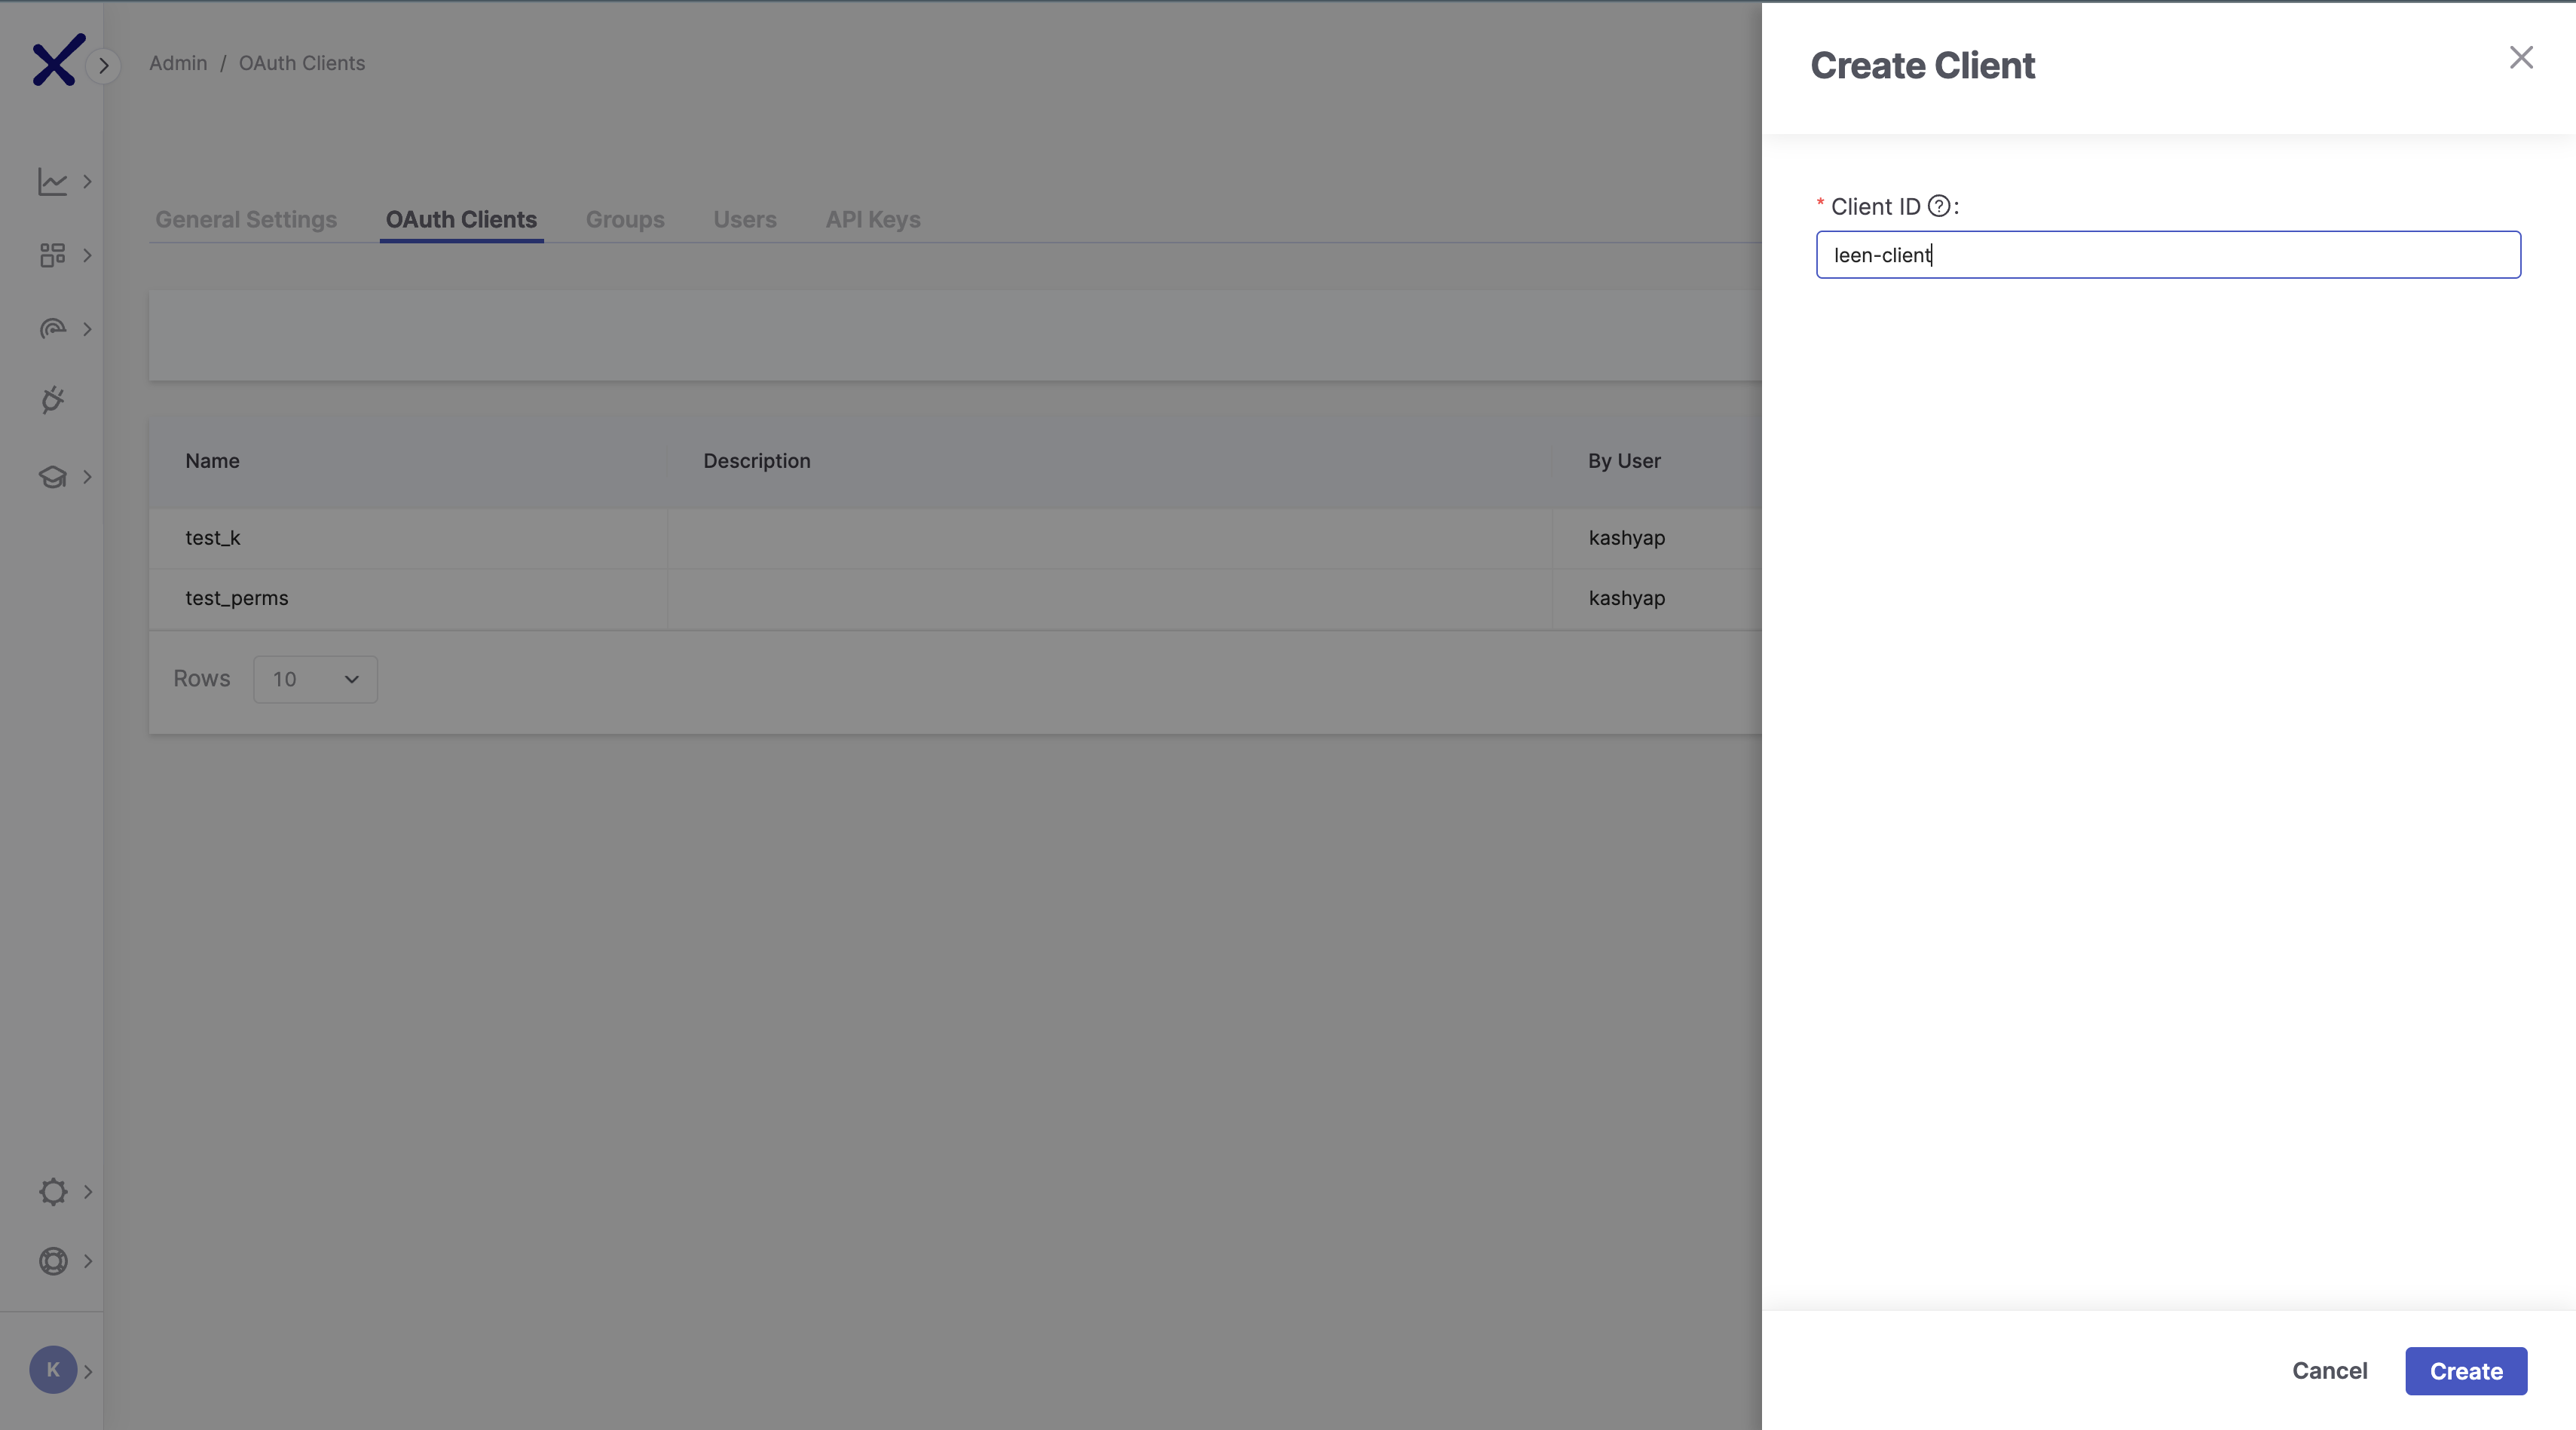
- Provide a name and description.
-
Assign the appropriate roles/permissions. For example, at least the following scopes are required:
View-applicationsView-projectsView-scansView-results
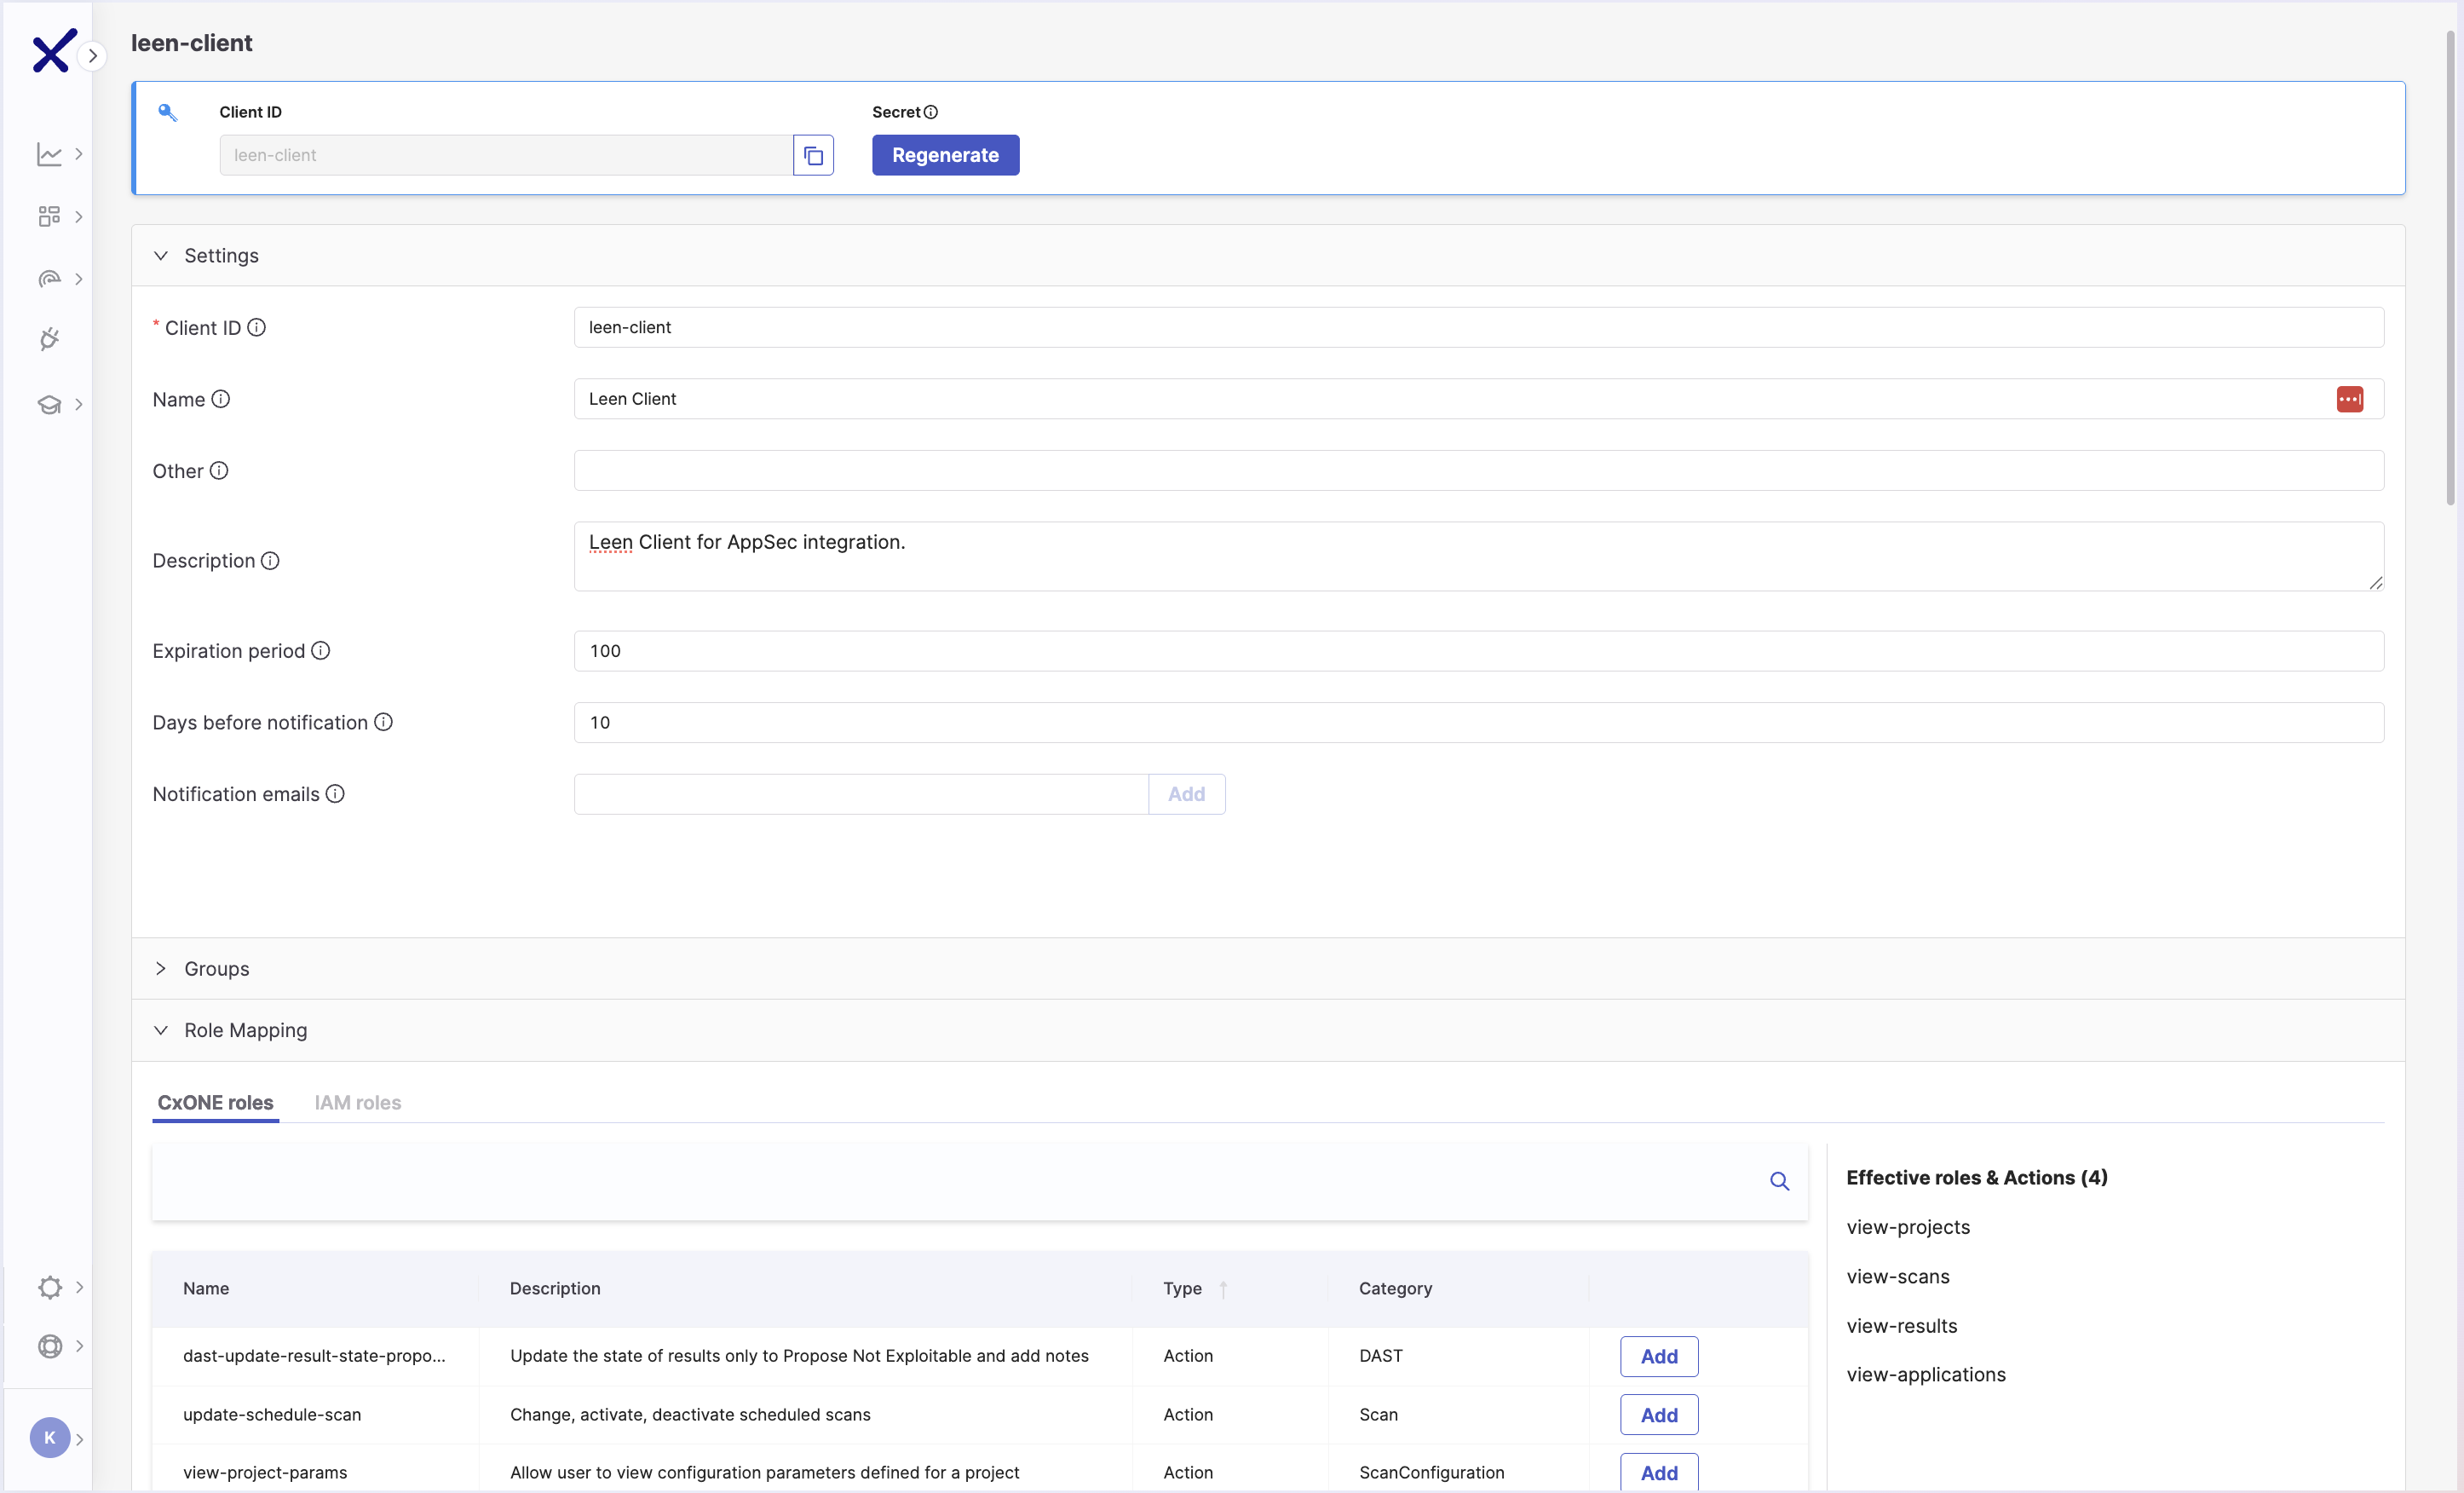
-
ast-viewer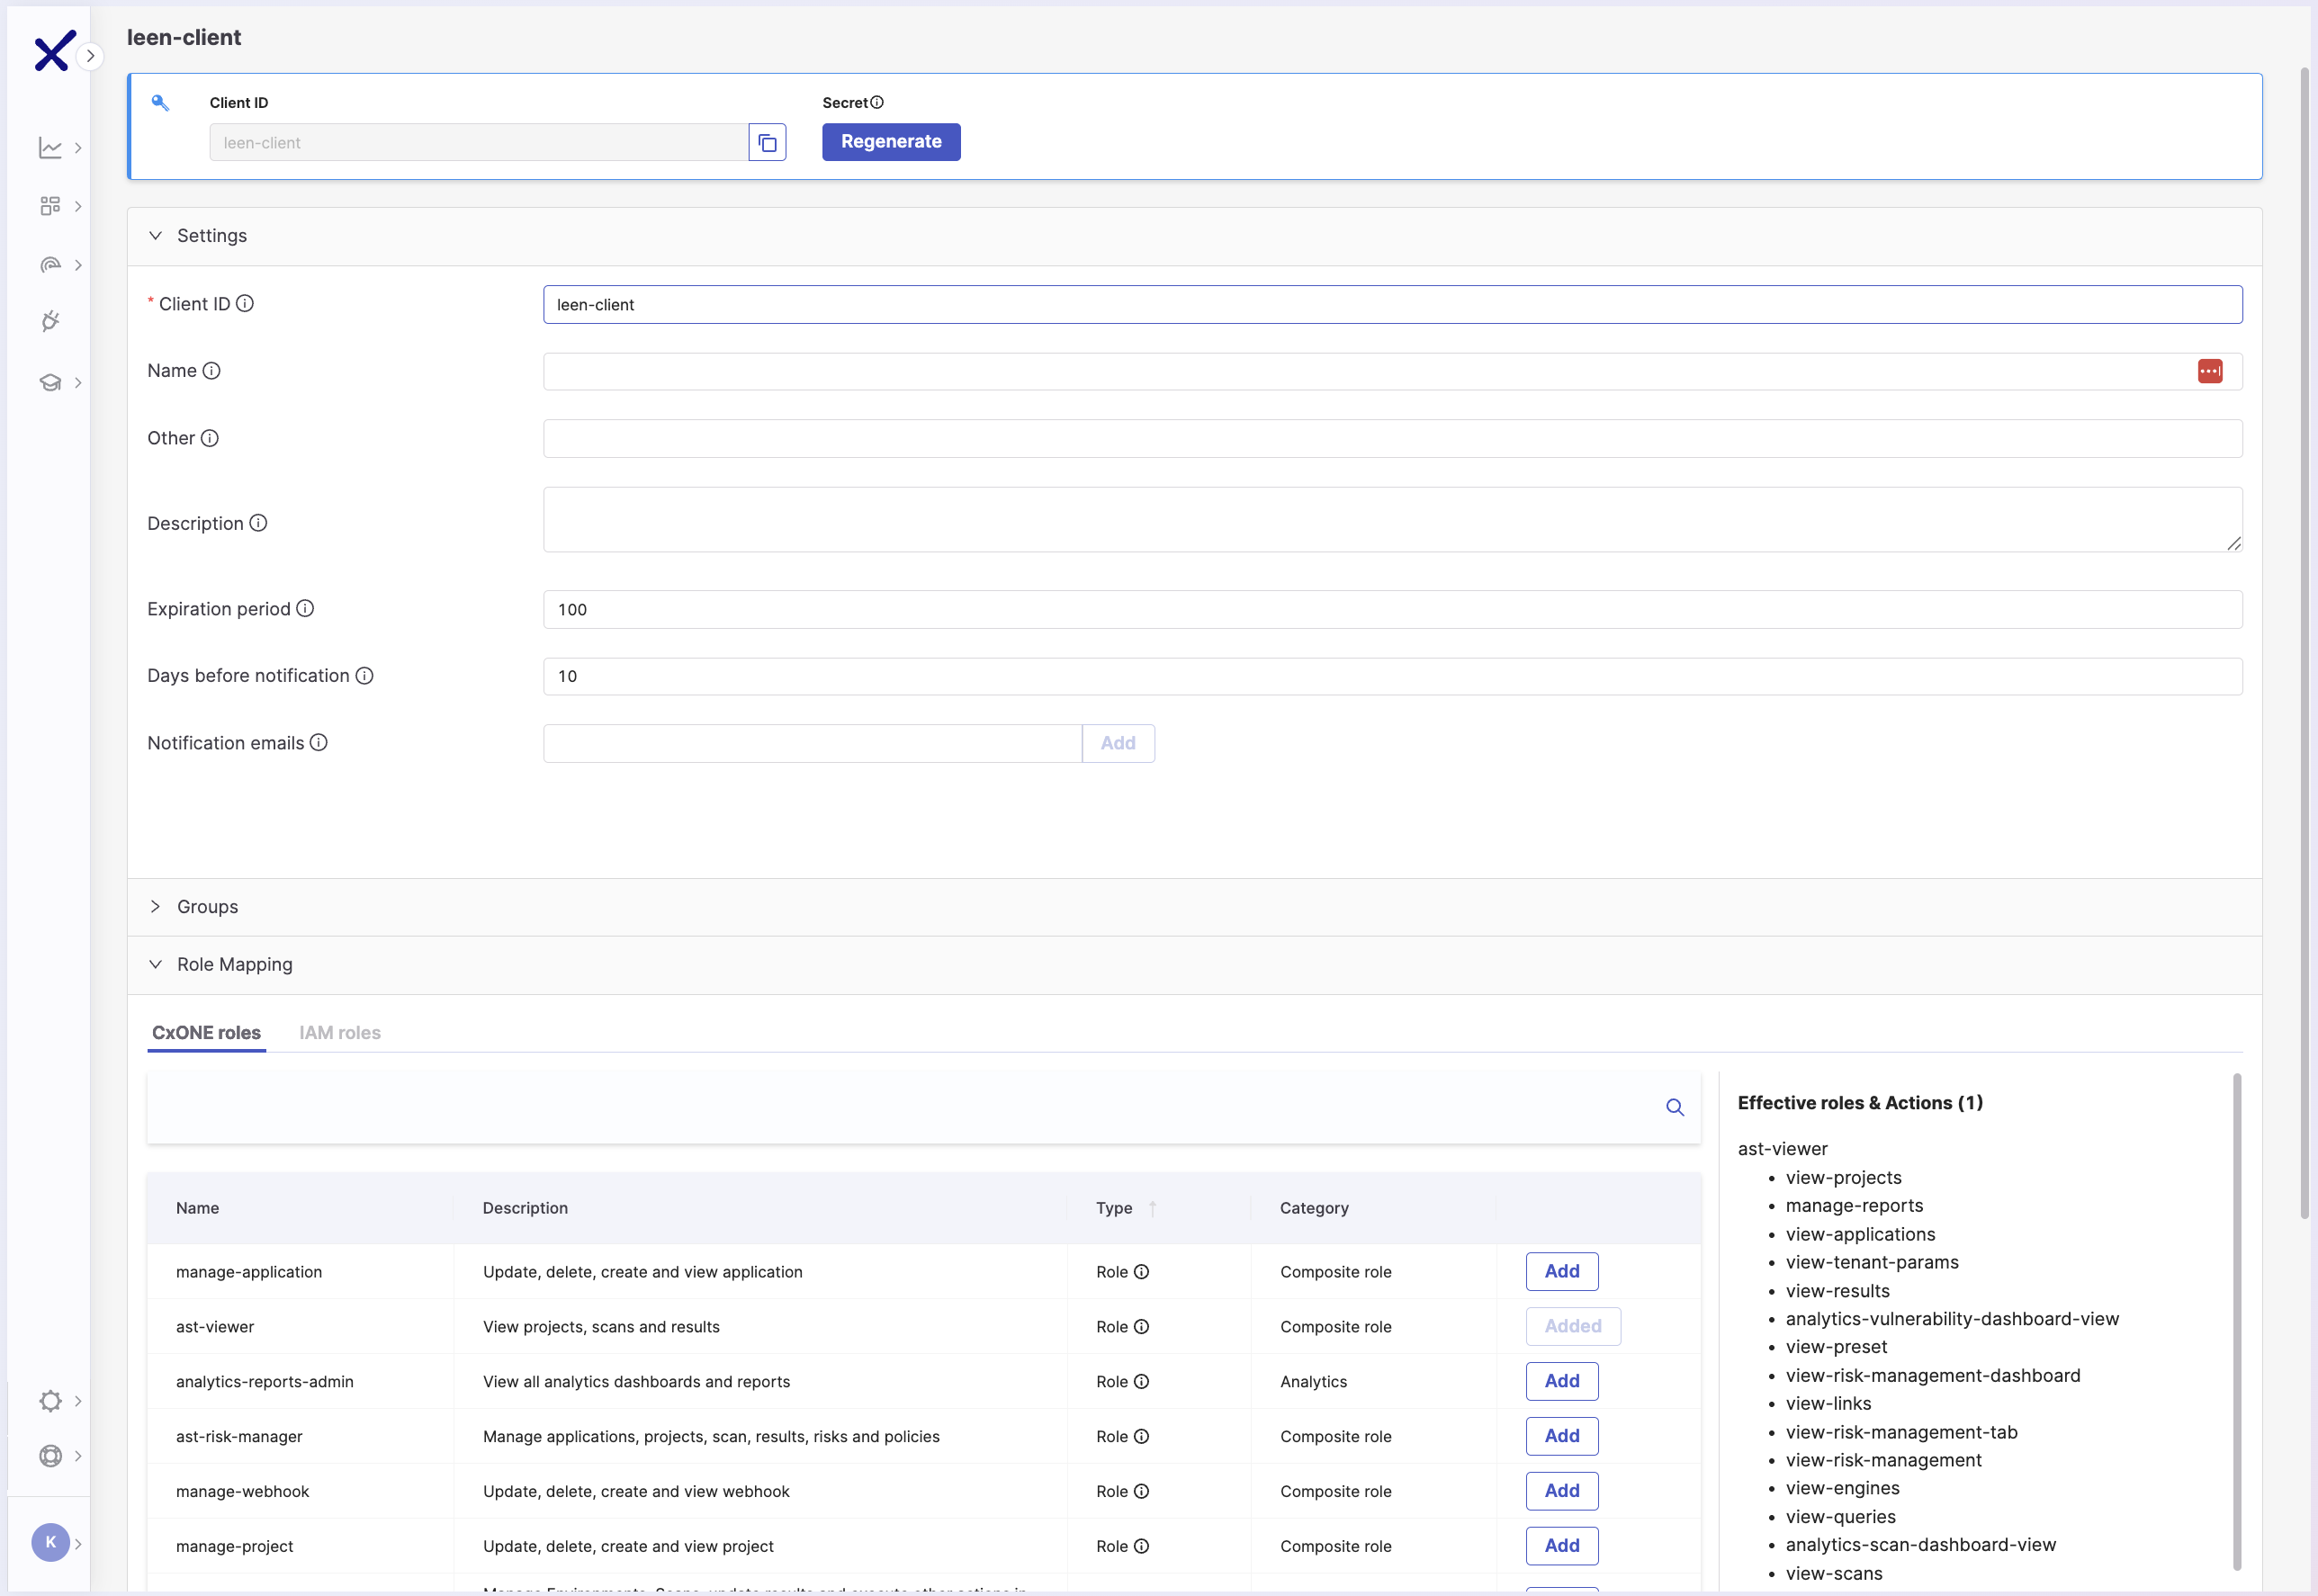
- Click Save and securely store the Client ID and Client Secret.
3
Enter Configuration Parameters in Leen
In your Leen integration configuration, provide the following:
-
API Base URL: Provide the API BASE URL corresponding to your region. Refer the table below:
- Tenant Name: Your Checkmarx One tenant name.
- Client ID: From the last step.
- Client Secret: From the last step.